Monday, May 30, 2011

Monogram burlap pillow

If you haven't picked up on it yet from my other posts, I am pretty much obsessed with monograms. I feel that a set of monogrammed initials portrays a sense of neat, preppy style. It can add an interest to the simplest of things. And, of course, it lets others know that your stuff belongs to you. 
The summer weather has motivated us to begin decorating our back deck and pergola, in hopes of some late afternoon al fresco dining. We haven't officially decided on a color scheme for throw pillows, rugs, etc, but I had an idea for a pillow that I wanted to make. I decided since I was making it out of burlap, it would go with anything. I started with a 14x20 outdoor pillow form, cut 2 pieces of burlap to fit accordingly, and sewed it together. Next, I created a circular monogram of my initials using Adobe Illustrator, printed it to make a stencil, and cut the letters out with an xacto knife. I placed the stencil in the middle of the pillow cover, and painted it with "antique white" acrylic paint. I sealed the painted monogram with a sprayed coat of polyurethane to protect it from moisture. Finally, I sewed the bottom side of the pillow cover closed and took the pillow outside to see it in its new surroundings. I am thinking we will end up with a few more like this in with our backyard decor.

Thursday, May 26, 2011

Mossy Monograms...again

A while back I posted a tutorial on my moss monogram letter. I loved how it turned out and it was a great detail for my friend's wedding. The only thing I didn't like about the project was the pictures. They were blurry and the lighting was completely wrong. Lately, I have sold quite a few sets of these letters on Etsy so I decided to use my latest order to try to get some better shots. 

Click here to see the tutorial!

Monday, May 23, 2011

Pink Peonies

Pink peonies are my all time favorite flowers.
If only I could run across this many pink peonies...
What a fabulous wedding bouquet!
Just gorgeous.

Sources: 1   2   3

Thursday, May 19, 2011

craft room in the making

So after years and years of piling the guest bedroom full of all the junk we didn't want to deal with, we finally cleaned it out. It has taken a great deal of time but was completely worth it because I finally get a craft room/office! I have organized all of my supplies so now the decorating process begins. While I typically love a neutral, serene color scheme, I have totally different plans for this room. I want it to be fun and colorful and most of all, girly with lots of pink. I have plenty of inspiring ideas and am now shopping for the perfect decor without spending a fortune. I'll keep you updated as I pull it all together to create my perfect little craft room.

Color and Design Inspiration
Urban Outfitters
Hannah DC
Lifestyle Bohemia
Deco love
You are my fave
Decor pad
Cupcakes and Cashmere
Better Homes and Gardens
Shoebox Decor

Saturday, May 14, 2011

Monogram Tray


Lately I have been seeing trays with all sorts of modern designs and funky, bright colors. I especially love the addition of large monogram in the center. I happened to have an unpainted wooden tray so I decided to give it a try. I decided to paint the tray gold to dress it up a bit. I measured the inside of the tray and cut a piece of fabric to the same dimensions. Then, I applied a layer of mod podge to the bottom of the tray, placed the fabric inside, and applied a top coat of mod podge. I created a stencil of my initials using Microsoft Word, traced the letters onto felt, and cut them out. That part was the most time consuming step. I smeared another thin layer of mod podge in the middle to hold the letters in place and then another over coat of mod podge. I think I still need to apply a glaze to seal everything but I'm still researching what I should use. I chose a black and white print fabric and used a coral color felt for the monogram to create a fun color scheme with the fancy gold edges. I think these would make super cute gifts and could be used in a variety of ways. I can't wait to put together other color and fabric combinations.


Linking to the DIY Project Parade at The DIY Show Off


Tuesday, May 10, 2011

Restored Bedroom Suite

This post is exciting to me because it one that I have greatly anticipated. Most of my other projects have been completed within a week but this furniture make-over has taken a good bit of time. The general labor didn't take any longer than expected but with all the crazy weather in Alabama recently, I was constantly dragging these very heavy pieces to and from the garage. One of my mom's best friends had this antique dresser/mirror and bed in her basement and asked me if I would want to fix it up to sell. I had so many ideas and I was so excited to finally get to put them to use. While the furniture had a very pretty structure and elegant engraved detail, it was definitely in need of some work. 
The top had a laminate coating on parts of it so first off, that had to go.
The legs were part laminate as well so I removed it all.
I had never used an electric sander, and while it was much faster than a sanding block, the thing was quite powerful. After I got used to it, I decided it was definitely a tool that I would be using from now on.
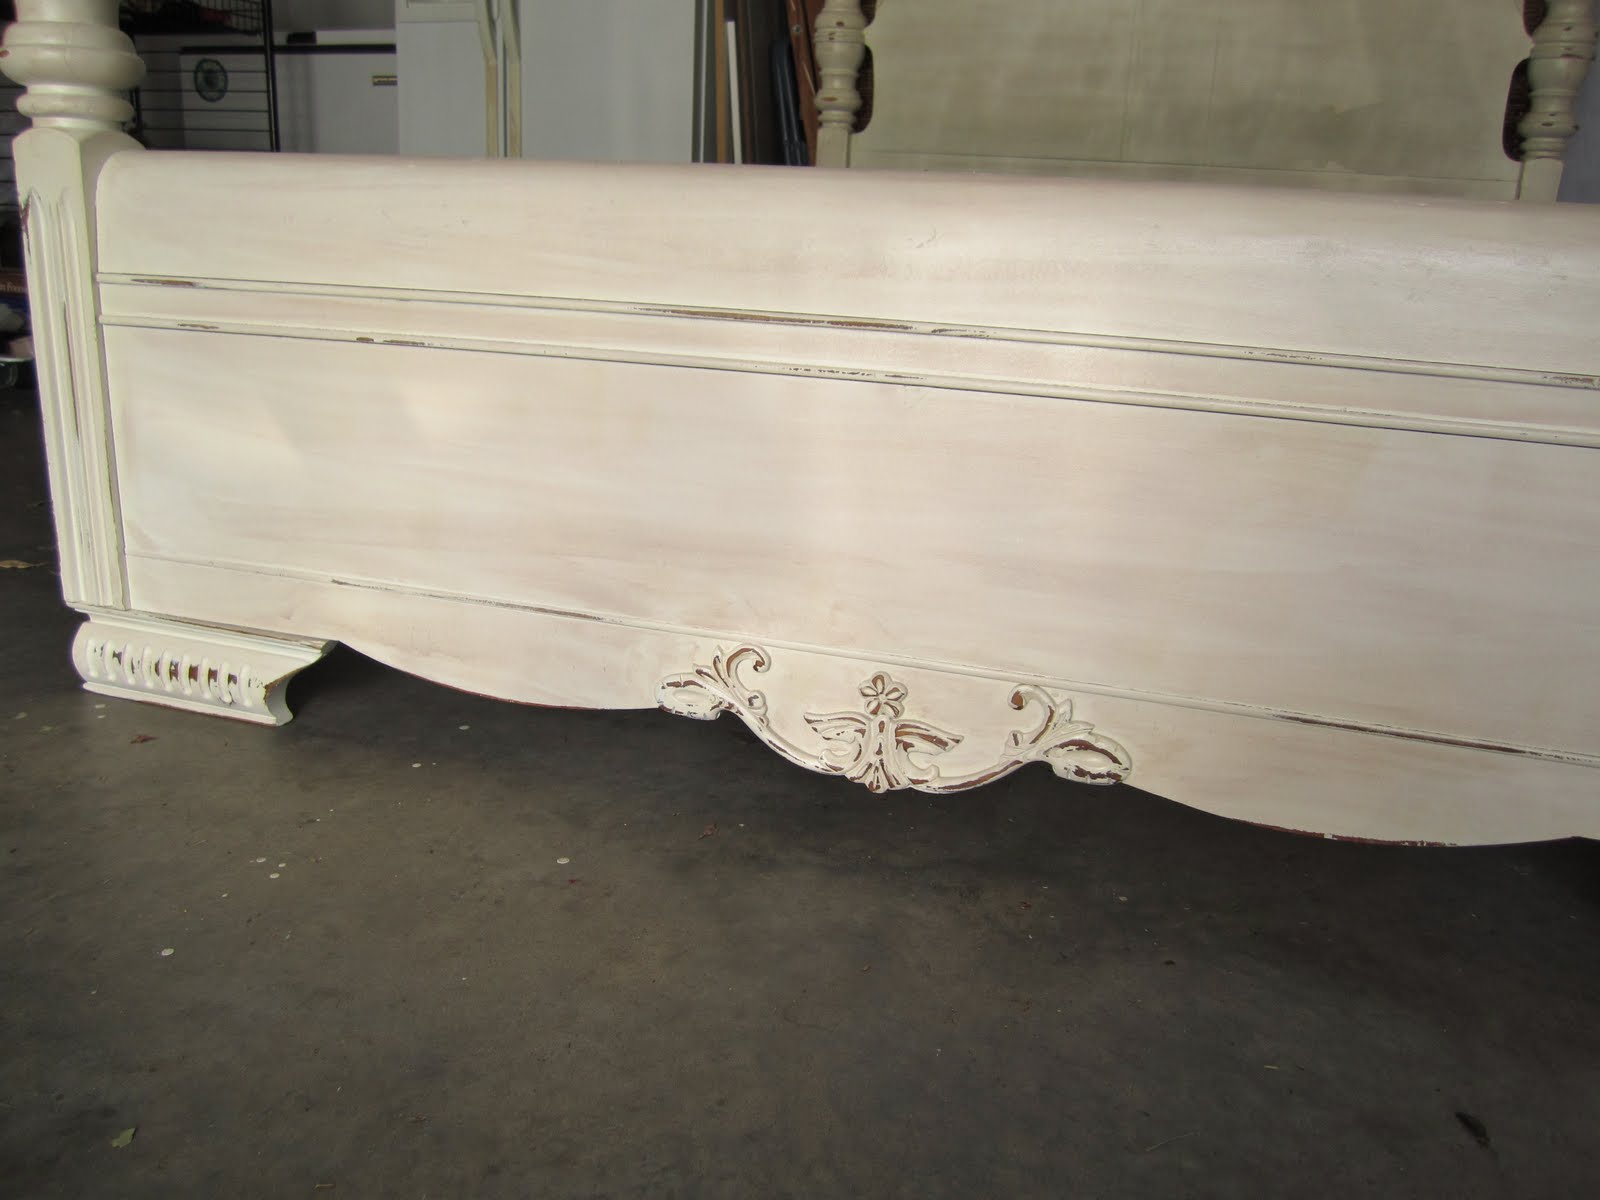
I decided to skip the pictures of the primer stage because primer just isn't all that pretty or interesting. I chose the base color to be a creamy white called "Woodlawn Lace" and then I added a brown glaze to accentuate the ornate detail. I used the electric sander again to distress the edges and then sealed the furniture with a polyurethane coating.
For the drawers, I wanted to add a stripe that was still in the neutral family but would create a soft contrast against the base color. I chose a shade called "Toasted Almond" which is a grayish/beige color. I felt that the stripes were defined, yet subtle. 
The little key hole adds such elegant charisma.
I really liked the original hardware because it shows the age of the furniture.
I just love how the combination of the glaze with the distressing brings out these details.
As much as I loved working on these pieces, I have to say the staging of the furniture was just as rewarding. What a fun job that would be!
Of course, Presleigh had to be part of the project too. She thought it would be a good selling factor.
Once everything was complete, I could really stand back and admire the bedroom suite. If only the bed were queen size, my current bedroom furniture would be for sale and this would be mine. My favorite part of the make-over would definitely be the dresser. I am in love with striped furniture and the simple colors are just my style. Now I'm on the lookout for a piece in my house that would be a good candidate for the same sort of striping action.